Until recently, sharpening knives in my kitchen was a frustrating, almost futile task. I tried high-end sharpeners, whetstones, and even those so-called “professional” pull-through tools, but nothing seemed to restore my dull blades the way I hoped. That changed during a trip to India, where I stumbled upon a street vendor using a surprisingly simple method that transformed dull steel into razor-sharp precision tools—in under a minute. What impressed me wasn’t just the sharpness, but how effortless and accessible the whole technique was.
The sharpener, an elderly craftsman sitting cross-legged beside a spinning wheel powered by a bicycle pedal, moved with intuitive grace. His tools were rudimentary, but his results were astonishing. As I stood watching, curious and skeptical, he invited me closer and explained the technique—something passed down for generations, built on physics and muscle memory rather than fancy gadgets. I went home, adapted what I saw using items already in my garage, and now, my kitchen knives are sharper and more effective than ever before—thanks to a technique that costs next to nothing and takes less than a minute per blade.
If you’ve ever invested in an expensive chef’s knife only to end up hacking away at vegetables with what feels like a butter knife, this story might change the way you handle blades forever.
How the simple Indian technique revolutionized my kitchen
| Feature | Details |
|---|---|
| Technique Origin | India – Street-style sharpening using friction wheel |
| Skills Required | Basic coordination and 2–3 tries to perfect the angle |
| Time to Sharpen | Approximately 1 minute per knife |
| Tools Needed | Rotary wheel or drill + sandpaper disk (or sharpening stone) |
| Knife Types | Works on any stainless steel or carbon steel kitchen knife |
| Cost to Set Up | Under $10 with household materials |
What makes this sharpening method different from the rest
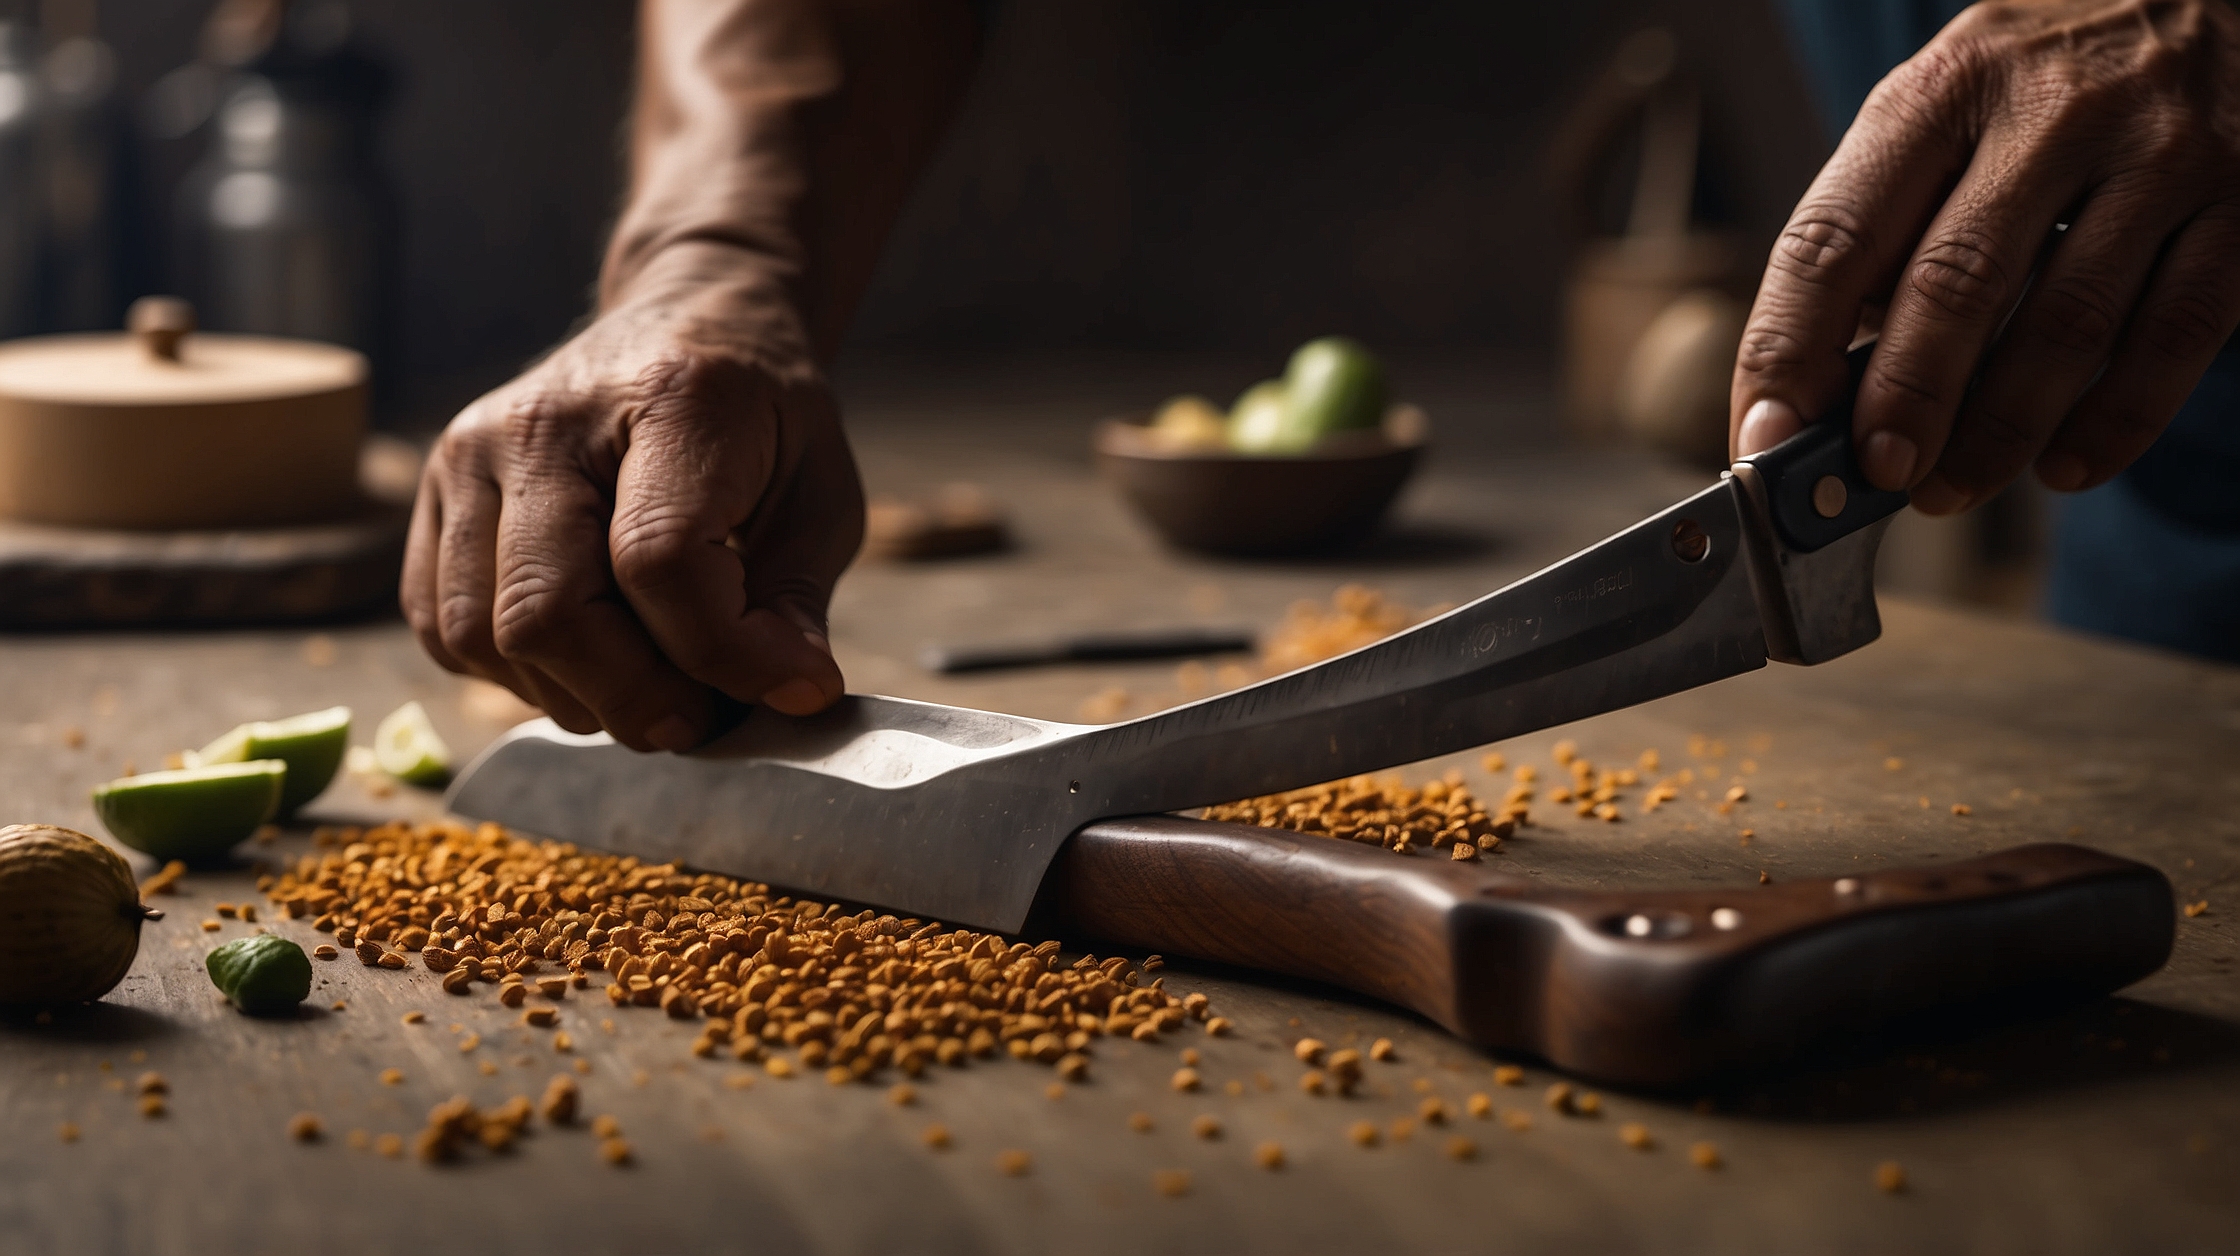
Unlike electronic sharpeners or whetstone techniques that require precision, this Indian-inspired approach relies on a rotating surface—either a sharpening stone attached to a drill or a simple sandpaper disc. The magic lies in keeping the blade at about a 20-degree angle during contact. The friction, when applied correctly, delivers consistent and surprising results.
The rotating wheel mimics the physics of the old bicycle-powered systems seen across towns and villages in India. The key difference is that you can easily replicate this motion using a common power drill or table grinder. Even an electric fan motor (with modifications) can give the needed RPM to mimic that sharp edge-infusion process.
Steps to replicate the technique at home
To get started, you need minimal preparation. In fact, most of what you’ll use is probably already in your toolbox or kitchen drawer:
- Attach coarse sandpaper (P60–P80) to a rotating platform – A drill press, a Dremel with a wide disc, or even a bench grinder will suffice.
- Grip your knife tightly and apply it at a consistent 20-degree angle to the rotating disc—just 5–10 light passes per side.
- Use minimal pressure—let the friction of the rotation do the work.
- Flip the knife and repeat on the other side for symmetrical edge-sharpening.
- Finish by stropping the blade with a leather belt or cardboard to remove burrs and refine the edge.
“This technique is about feel, not force. Once you get the angle right, the blade will sharpen itself naturally.”
— Manoj Patel, Traditional Knife Sharpener in Mumbai
Why even dull, old knives become like new
The science is simple: by using high-speed friction with a consistent angle, you’re essentially re-aligning the knife’s edge while removing metal shavings that dull performance. Many kitchen knives fail not because they’re cheap, but because their edges roll over and lose integrity. This method realigns and redefines the cutting edge with surgical precision.
Even blades that haven’t been touched in years can return to near-retail sharpness. One of my kitchen knives was over a decade old, riddled with micro-chips and blade warping. Within the first try of this method, I was slicing tomatoes thinner than I ever thought possible. No more forceful pushing; just smooth, guided slicing.
How safety plays a crucial role in this method
While it’s easy to get excited by the results, it’s equally important to stay safe. Always:
- Wear safety glasses to avoid debris in eyes
- Use cut-resistant gloves if you’re new to handling blades
- Secure your rotary device properly
- Keep water nearby to prevent overheating of the blade
Once you get a feel for maintaining the angle and touch, the process becomes intuitive—and safer.
“Common safety lapses often lead to accidents with sharp tools. Respect the blade, and it’ll serve you well.”
— Dr. Violet Kumar, Occupational Safety Specialist
Budget-friendly performance without compromise
Professional-grade knife sharpeners can cost anywhere from $50 to $500, with results varying depending on the skill and brand. The beauty of this Indian-inspired method is that it delivers similar, if not better, results for a fraction of the cost. All you need is a good blade, a rotary motion, and a steady hand.
For less than $10, including materials like sanding discs or makeshift wheels, you can have razor-sharp knives at your fingertips anytime. No subscriptions, no technicians, and no waiting days to get your kitchen tools back.
How it compares to traditional sharpening tools
| Winners | Losers |
|---|---|
| Home Cooks Seeking Quick Results | Retail Knife Sharpening Services |
| Budget-Conscious Households | High-Cost Electric Knife Sharpeners |
| DIY Enthusiasts | Complex Whetstone Sharpening Kits |
Real-world results and long-term value
After several months of use, the biggest benefit has been consistency. I now sharpen my knives monthly, knowing it takes little time and even less money. More importantly, the respect I’ve gained for blade maintenance has led to safer cooking, better food texture, and fewer slips and nicks in the kitchen.
The durability of the sharpened edge also improved. While pull-through sharpeners often create short-lived razor sharpness that dulls quickly, this rotary friction method results in edges that stay sharp longer—sometimes for weeks with moderate use.
“It’s not about just sharpening—it’s about reviving the soul of the tool.”
— Kavita Sharma, Culinary Historian
Is it right for you?
This method isn’t for everyone. If you prefer plug-and-play gadgets or shy away from DIY tasks, it might seem daunting at first. But for those open to trying a tactile, time-tested method, the payoff is quick mastery and long-term satisfaction. And in a universe where cooking tools often define the joy of cooking itself, this small change could make a big difference in your daily life.
Frequently asked questions
How often should I sharpen my kitchen knives using this method?
Generally, once a month is ideal for home cooks. Frequent users may want to sharpen every two weeks for best performance.
Can I use this on serrated knives?
No, this method is best for straight-edge blades. Serrated knives require specialized sharpening techniques.
What kind of sandpaper works best?
Coarse grit (P60–P80) sandpaper works well for restoration. Use finer grits (P120–P400) for finishing.
What angle should the knife be held at?
A consistent 20-degree angle on both sides delivers optimal sharpness.
Is this method safe for beginners?
Yes, with proper safety gear and initial practice, it becomes very intuitive and safe to use at home.
Do I need electricity for this method?
You can use hand-cranked methods or electric rotaries. Either works—the goal is consistent wheel motion.
What’s the maintenance involved for the tool setup?
Minimal. Change sandpaper or sharpeners when worn. Clean the rotary area occasionally to remove metal dust.