Dusty blinds casting shadows over your beautiful windows, kitchen grease creating that stubborn sticky film, and precious weekend hours slipping away on tedious cleaning tasks. If this scenario sounds painfully familiar, you’re not alone in the struggle against one of home cleaning’s most frustrating challenges. Millions of homeowners worldwide wrestle with the awkward geometry of blind slats, the delicate balance between thorough cleaning and potential damage, and the sheer time investment required to make blinds sparkle again.
Yet buried in our sock drawers lies an unexpectedly powerful solution that’s been quietly revolutionizing the way people approach blind maintenance. This isn’t another expensive gadget or chemical-laden spray promising miraculous results. Instead, it’s a brilliantly simple technique that transforms an ordinary sock into a precision cleaning tool, allowing you to tackle every slat with unprecedented control and efficiency.
The beauty of this sock cleaning hack lies in its elegant simplicity and immediate accessibility. No special trips to the hardware store, no complicated assembly instructions, and no storage concerns for bulky equipment. What makes this approach so remarkable is how it leverages the natural dexterity of your hand while providing the perfect cleaning surface that adapts to every curve and corner of your blinds.
Social media platforms and home improvement forums are buzzing with testimonials from people who’ve discovered this game-changing method. From busy parents reclaiming their weekends to elderly homeowners finding renewed independence in their cleaning routines, this technique is proving that sometimes the most effective solutions are also the most wonderfully simple.
The Science Behind the Sock Cleaning Revolution
The sock cleaning hack works because it solves multiple cleaning challenges simultaneously. Traditional feather dusters merely redistribute dust particles, often sending them airborne where they resettle elsewhere. Rigid cleaning tools can’t navigate the complex angles and tight spaces where blinds accumulate their stubborn grime. Paper towels tear and leave residue, while spray bottles create uncontrolled moisture that can damage delicate mechanisms.
A sock transforms your hand into a custom-fitted cleaning implement that maintains perfect pressure control. Your fingers naturally follow the contours of each slat, reaching into crevices that would challenge even the most specialized tools. The fabric provides just enough texture to grab particles without scratching surfaces, while the snug fit prevents bunching or slipping during use.
What People Are Saying
Αρσεναλ – Σάντερλαντ: (X) 0-0 τελικό
— Pathfinder Sports (@pathfinderSport) February 21, 2009
“I’ve been a professional cleaner for over fifteen years, and I wish I had discovered this method sooner. The sock technique gives you complete control over pressure and moisture while allowing you to feel exactly what you’re cleaning. It’s revolutionized how I approach delicate surfaces,” says Maria Rodriguez, owner of SparkleClean Professional Services.
Step-by-Step Implementation Guide
Mastering this sock cleaning hack requires understanding both the technique and the preparation that makes it so effective. The process transforms what typically takes hours into a manageable task that can be completed in segments.
- Preparation Phase: Select a clean, old sock (cotton or microfiber work best). Prepare your cleaning solution in a bowl or bucket. Ensure adequate ventilation and remove any delicate items from the immediate area.
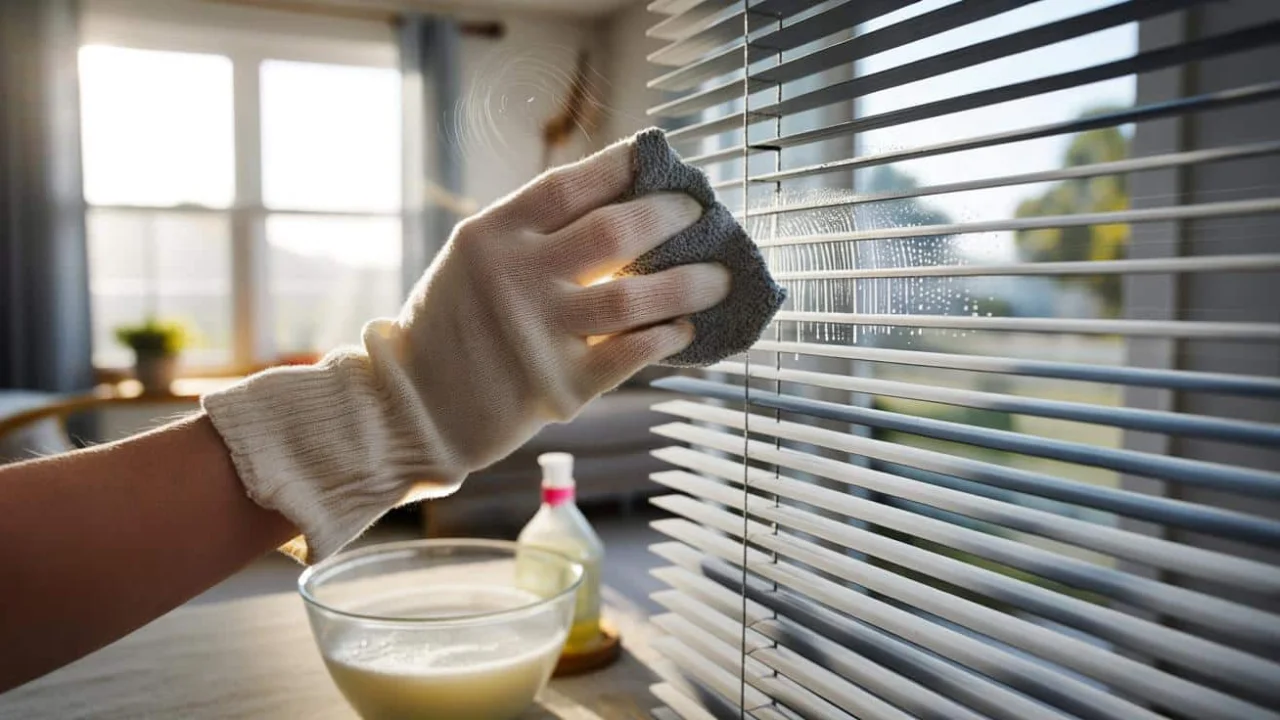
- Application Phase: Slip the sock onto your dominant hand like a glove. Dip lightly in cleaning solution and wring thoroughly until damp but not dripping. The moisture level is crucial for effectiveness without damage.
- Cleaning Motion: Pinch each slat between your thumb and fingers, then slide smoothly along the entire length. This single motion cleans both sides simultaneously while maintaining consistent pressure.
- Maintenance Phase: Rinse and wring the sock frequently as it accumulates dirt. Replace with a fresh sock if the first becomes too saturated or dirty to be effective.
- Finishing Phase: Use a dry sock for final buffing if desired. Check for any missed spots and address them while your cleaning solution is still prepared.
Optimal Sock Selection and Preparation
Not all socks deliver equal cleaning performance, and understanding the differences can significantly impact your results. The fabric choice affects everything from dust capture to moisture retention and surface compatibility.
| Sock Type | Best For | Advantages | Considerations |
|---|---|---|---|
| Cotton | General cleaning, delicate surfaces | Soft, absorbent, widely available | May require more frequent rinsing |
| Microfiber | Heavy dust, allergen removal | Superior particle capture, static cling | Slightly more expensive, less common |
| Cotton-blend | Regular maintenance cleaning | Balanced performance, durable | Variable quality depending on blend |
| Bamboo fiber | Eco-conscious cleaning, antimicrobial needs | Naturally antibacterial, sustainable | Limited availability, higher cost |
Cleaning Solution Formulations for Maximum Effectiveness
The liquid component of this sock cleaning hack must balance cleaning power with surface safety. Different blind materials and contamination levels require tailored approaches that maximize results while preventing damage.
- Light Dust Formula: Mix 1 liter warm water with 1-2 teaspoons mild dish soap. This gentle solution handles routine maintenance without harsh chemicals or residue buildup.
- Grease-Cutting Formula: Combine 1 liter warm water, 2 teaspoons dish soap, and 2 tablespoons white vinegar. The acid cuts through kitchen grease while remaining safe for most surfaces.
- Disinfecting Formula: Add 1 tablespoon rubbing alcohol to the basic soap solution. This variation provides antimicrobial action for high-touch areas or post-illness cleaning.
- Natural Alternative: Mix warm water with castile soap and a few drops of essential oil. This eco-friendly option avoids synthetic chemicals while providing pleasant fragrance.
“The key to any cleaning success is matching your method to your specific situation. This sock technique works because it’s adaptable – you can adjust pressure, moisture, and cleaning agents based on what you’re actually dealing with, not what some manufacturer thinks you might encounter,” explains Dr. Jennifer Walsh, materials science professor at Portland State University.
Troubleshooting Common Challenges
Even the most straightforward cleaning methods can present unexpected obstacles. Understanding potential issues and their solutions ensures consistent success with your sock cleaning routine.
Excessive moisture represents the most frequent problem, often resulting from insufficient wringing or overly wet cleaning solutions. Water droplets can stain fabrics, warp wood, or damage mechanical components. The solution involves better moisture control and more frequent sock wringing during the cleaning process.
Streak formation typically occurs when cleaning solutions dry too quickly or contain excessive soap. Reducing soap concentration and working in smaller sections prevents this issue. If streaks appear, a slightly damp clean sock can remove them before they set.
Fabric snagging happens when socks develop rough spots or when blinds have sharp edges or damaged components. Regular sock inspection and gentle pressure prevent most snagging incidents. Replace worn socks promptly to maintain smooth operation.
Professional Insights and Advanced Techniques
Professional cleaners have refined this basic sock cleaning hack into sophisticated techniques that address specific challenges and material types. These advanced approaches can transform amateur efforts into professional-quality results.
“We’ve discovered that the direction of your cleaning motion matters more than most people realize. Always move from the center outward toward the edges, and maintain consistent speed. This prevents dust from accumulating at the ends and ensures even cleaning across each slat,” notes Robert Chen, certified cleaning technician with 20 years of experience.
Temperature management represents another crucial factor. Warm solutions clean more effectively than cold, but excessive heat can damage certain blind materials. Room temperature or slightly warm solutions provide optimal balance for most applications.
The timing of cleaning sessions affects both efficiency and results. Early morning cleaning takes advantage of settled dust that hasn’t been disturbed by daily activities. Avoid cleaning immediately after cooking, when airborne particles are still settling.
Frequently Asked Questions
How often should I clean my blinds using this sock method?
Monthly cleaning prevents heavy buildup, though kitchens may need bi-weekly attention depending on cooking frequency.
Can this technique damage expensive wooden blinds?
When properly executed with minimal moisture, it’s safe for wood. Test inconspicuous areas first.
What’s the best way to clean vertical blinds with socks?
Work from top to bottom, supporting each slat with your free hand to prevent bending.
Should I remove blinds from windows before cleaning?
Not necessary for routine cleaning. Remove only for deep cleaning or repairs.
How do I prevent dust from resettling during cleaning?
Close windows, turn off fans, and work systematically from one end to the other.
Can I use fabric softener in my cleaning solution?
Avoid fabric softener as it leaves residue that attracts more dust over time.
Just tried the sock cleaning hack on my kitchen blinds and I’m genuinely shocked at how well it worked! Why did nobody tell me about this sooner? 🧦✨ #CleaningHacks #HomeTips
— Sarah Johnson (@SarahHomeHacks) March 1, 2024
Long-term Benefits and Maintenance Strategies
Regular implementation of this sock cleaning technique extends blind lifespan significantly while reducing the need for professional cleaning services. The gentle nature of the method prevents the wear and tear associated with harsh scrubbing or chemical exposure.
Beyond immediate cleaning benefits, this approach develops better awareness of your blind condition and maintenance needs. Regular hand contact reveals loose components, damaged slats, or mechanism issues before they require expensive repairs. This early detection capability often saves homeowners hundreds of dollars in replacement costs.
The environmental impact deserves consideration as well. Traditional blind cleaning often involves disposable wipes, aerosol sprays, and specialized tools that eventually require replacement. The sock method utilizes items you already own and biodegradable cleaning solutions, significantly reducing waste and chemical exposure in your living environment.
Cost analysis reveals substantial savings over time. Professional blind cleaning services typically charge $3-8 per blind, while this DIY approach costs mere pennies per cleaning session. For homes with multiple windows, annual savings can reach several hundred dollars while achieving comparable or superior results through more frequent maintenance.